Dependency management in both Eclipse and Android Studio can be a serious pain. Now that we have gradle, there’s a better way to build android apps: we can configure our library projects to publish maven artifacts to a maven repository and we can configure our app projects to consume those artifacts. Once projects are setup to produce and consume maven artifacts, building an app with many dependencies becomes much more manageable.
In this post, I will say a little bit about why dependency management can be painful and I will explain how to use archiva and gradle to make dependency management a breeze.
The Dumb Way
With Eclipse, the workflow for creating a multi-project setup went something like this:
-
Create an app project.
-
Create library projects.
-
Add library projects as a dependencies for the app project.
-
Push all projects to version control
This isn’t terrible, but whenever someone else wants to build your app, they need to:
-
Checkout the app project
-
Import that project into Eclipse
-
Checkout library projects
-
Import those projects into Eclipse
-
Add those library projects as dependencies for the app project.
If you’re building an app that uses 3+ libraries, this can be pretty painful.
Even with Android Studio, it can be challenging to create a workable multi-project setup. I’ve already discussed those challenges, so I won’t do so again here.
The Smart Way
The first thing you need to ‘build apps smarter’ is a maven repository. I’ll explain how to setup Archiva, but you could easily use other maven repo solutions.
Start by downloading archiva. Next, start archiva by running:
/bin/archiva console
After archiva finishes loading (which could be a while), you can load up the interface by pointing your browser to localhost:8080.
At this point, you need to create 2 users. First, create an admin user by clicking the ‘Create admin’ button at the top right corner of the screen. After you create an admin user, you should be automatically logged in.
At this point, you can click the ‘Manage’ menu item in the side menu (its the first menu item underneath the section heading with the title ‘Users’). From here, its pretty easy to create a user. This is the user that gradle will use to publish artifacts to the repo, so remember the username and password you enter here for later.
Once you create the user, you’ll need to edit the user so that it can manage your repositories. To do this, click the pencil-looking button next to the user you’ve just created. Next select the ‘Edit Roles’ tab. Finally, check the ‘Repository Manager’ box next to the ‘internal’ repository and click update.
That’s the bare minimum you need for your archiva maven repo setup. Now you just need to configure your projects to publish artifacts to and consume artifacts from the maven repo.
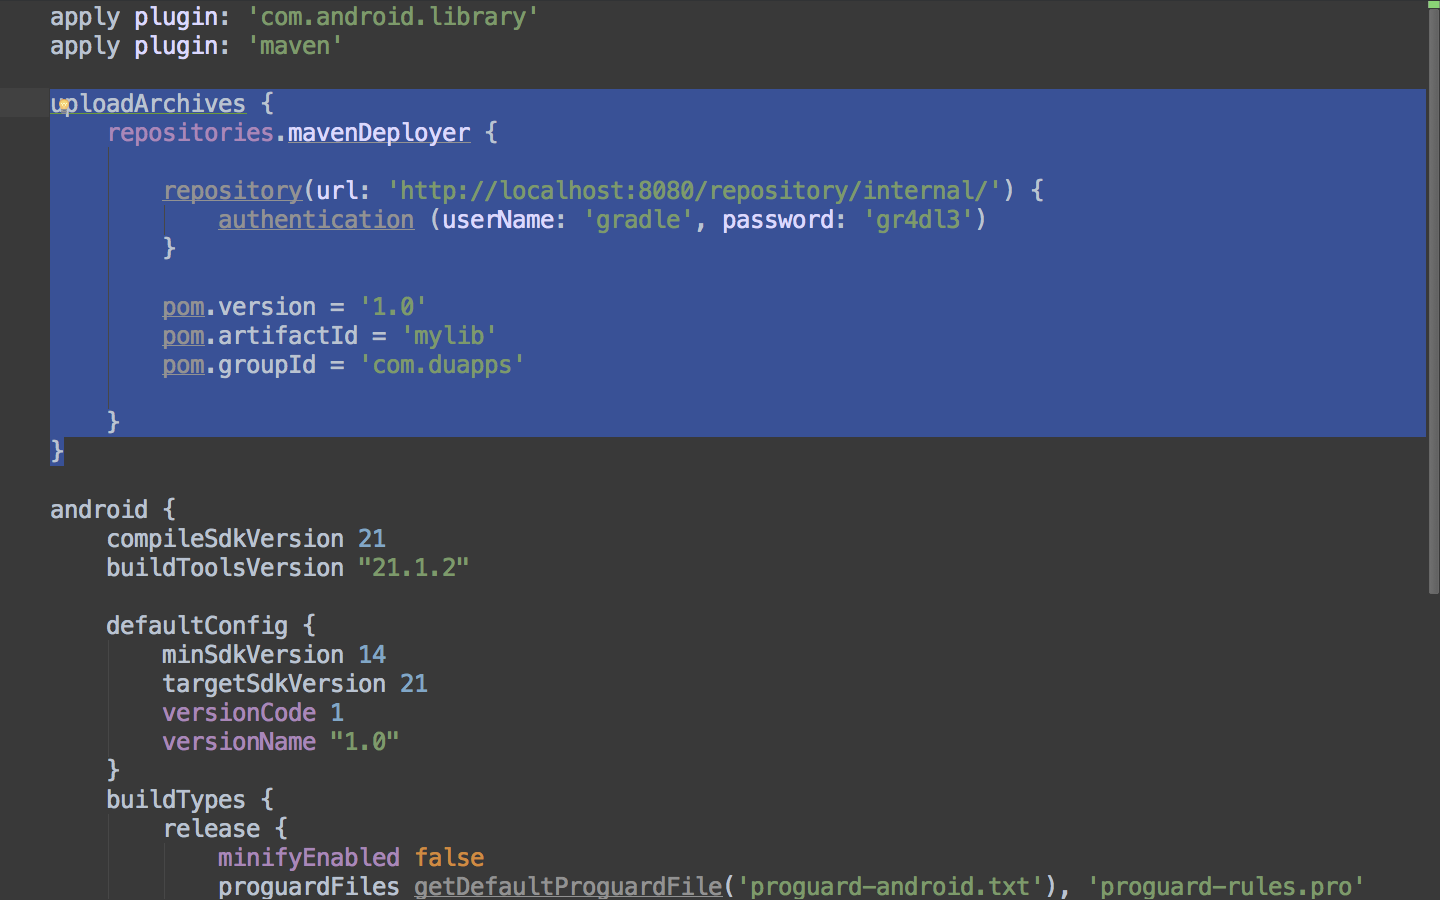
Let’s start with configuring our library projects to publish .aar files as consumable maven artifacts. Open up the build.gradle file for the module that contains your library code. First, apply the maven plugin to your module. Then add the code that will upload the build output of your library project to the maven repo:
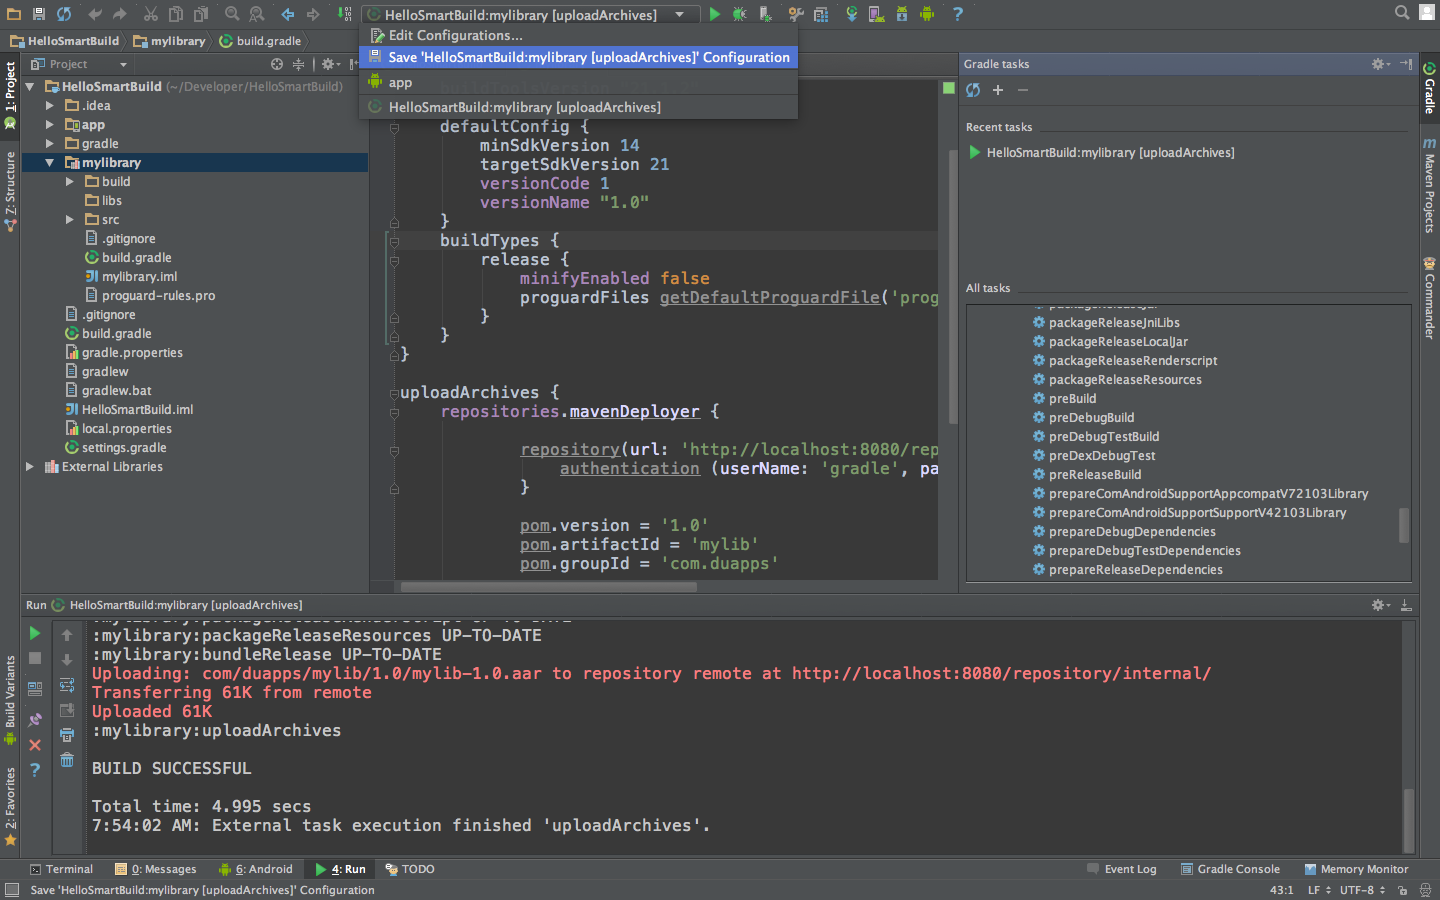
In order to upload your artifact to archiva, you simply run the uploadArchives task. That can been done within Android Studio with the following steps:
-
Ctrl + Shift + A (Cmd + Shift + A on the mac)
-
Type ‘Gradle’ into the action search bar
-
Select ‘Gradle’ from the list of actions
-
Once the gradle tasks window appears, double click uploadArchives from the ‘All Tasks’ list
-
Once this is done, you should be able to save this gradle task as a build configuration so that running it again is simpler:
Another way to run the uploadArchives task is to use the gradle wrapper in your project. The command is simple:
/gradlew uploadArchives
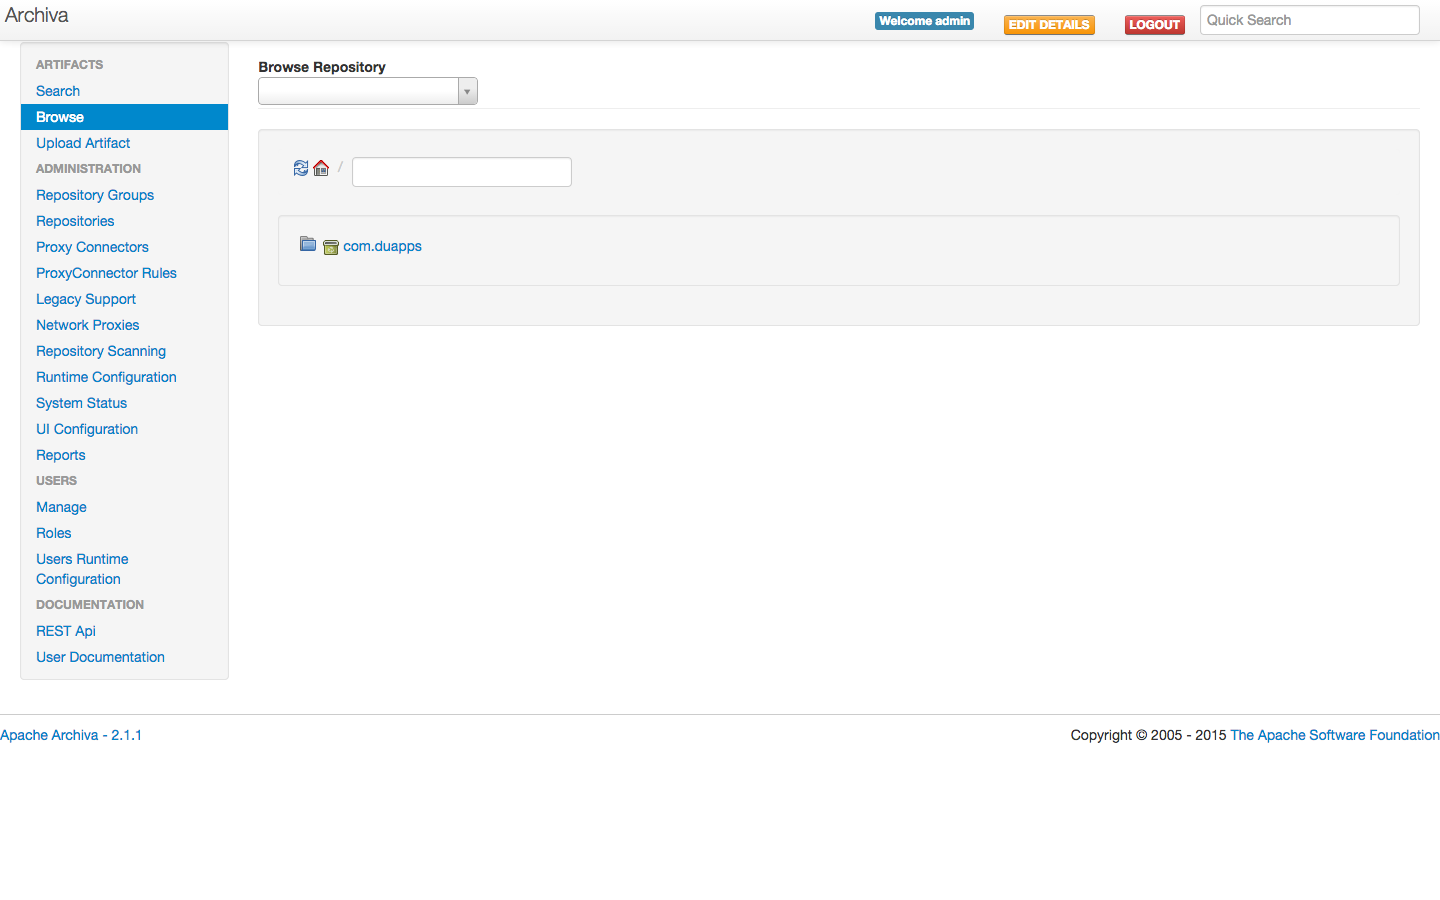
If the task runs successfully, you should be able to return to the archiva interface, select “Browse” from the side menu, and see the artifact that you’ve just uploaded:
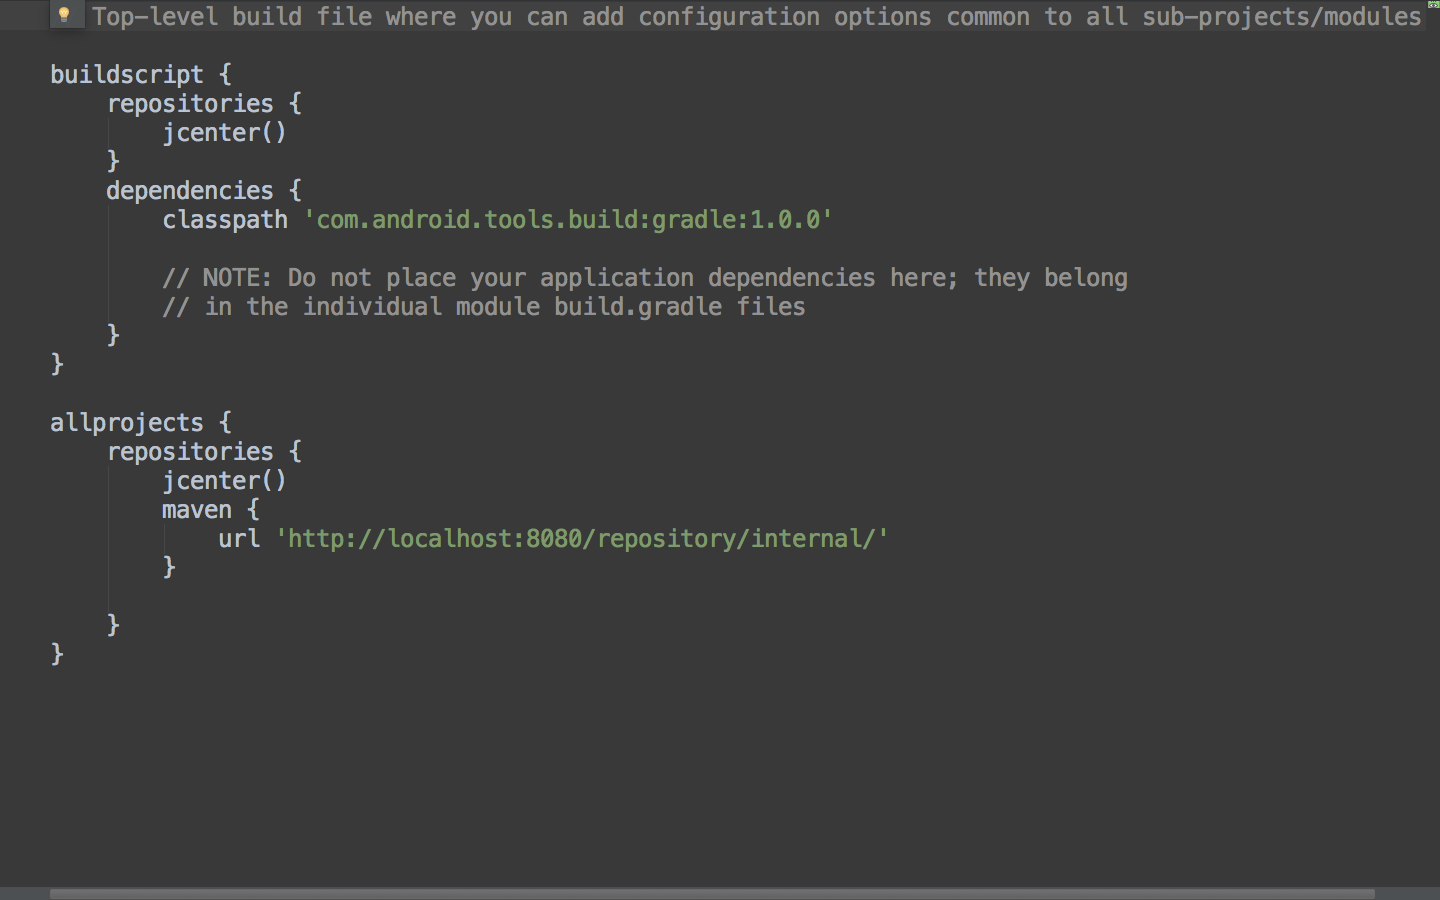
 To configure your app projects to consume the maven artifacts that you publish to archiva, you need to make two changes to two different build.gradle files in your project. First, go to the top level gradle file and add your archiva instance as a maven repository. Adding archiva as a maven repo is simple:
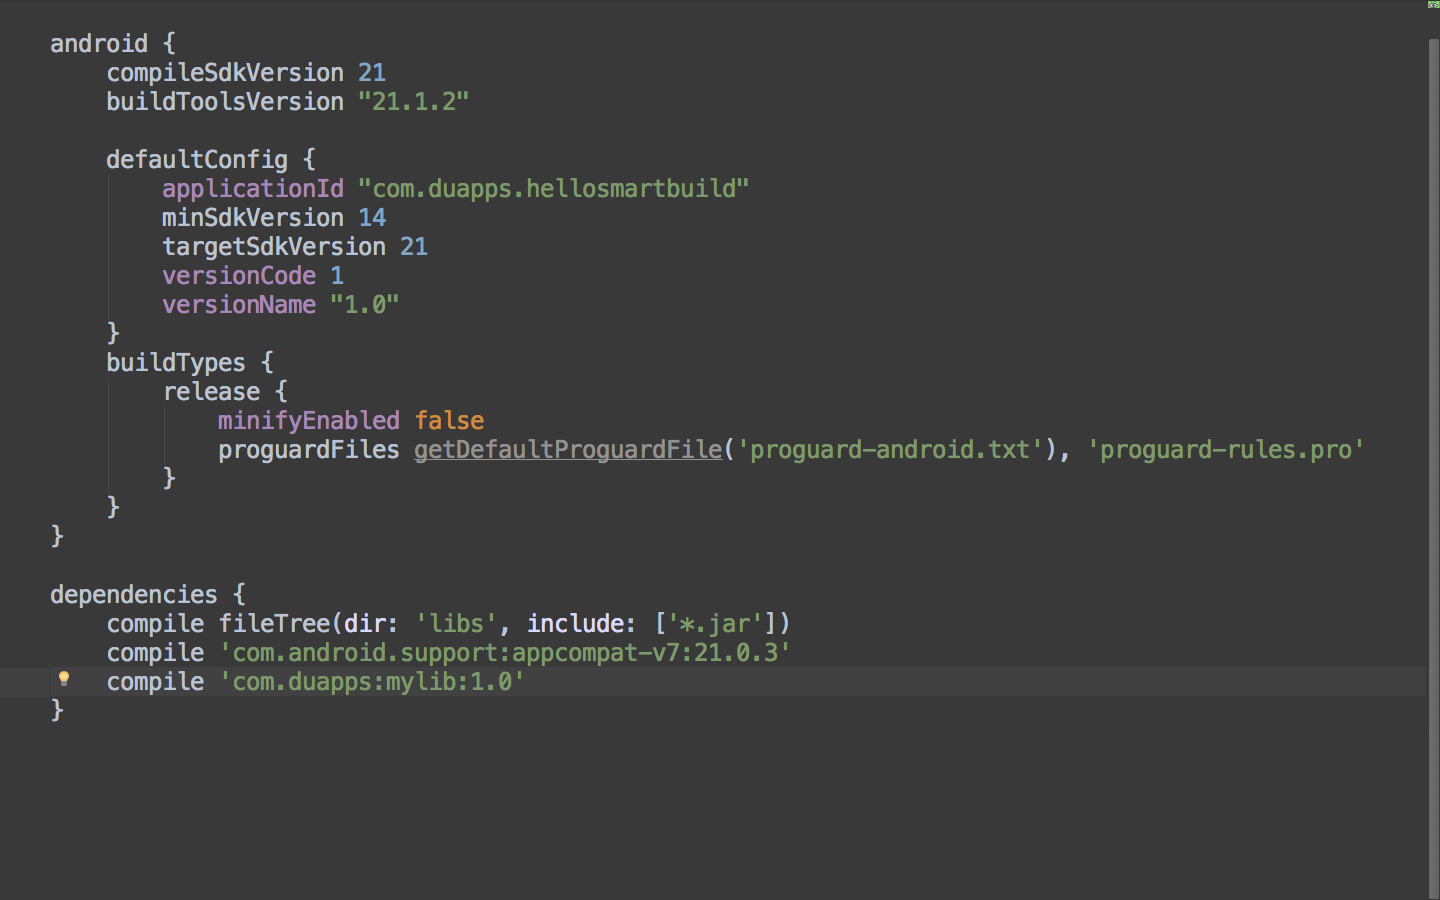
Next, go to the build.gradle file for the particular module you are building. Here, you simply need to add the maven artifact as a dependency to your module:
That’s it! Once you’ve configured all your library projects to publish artifacts to archiva, building projects that are dependent on multiple libraries is now really simple. It involves exactly one step:
- Checkout app project. Hit build.